Cheesy Potato Balls
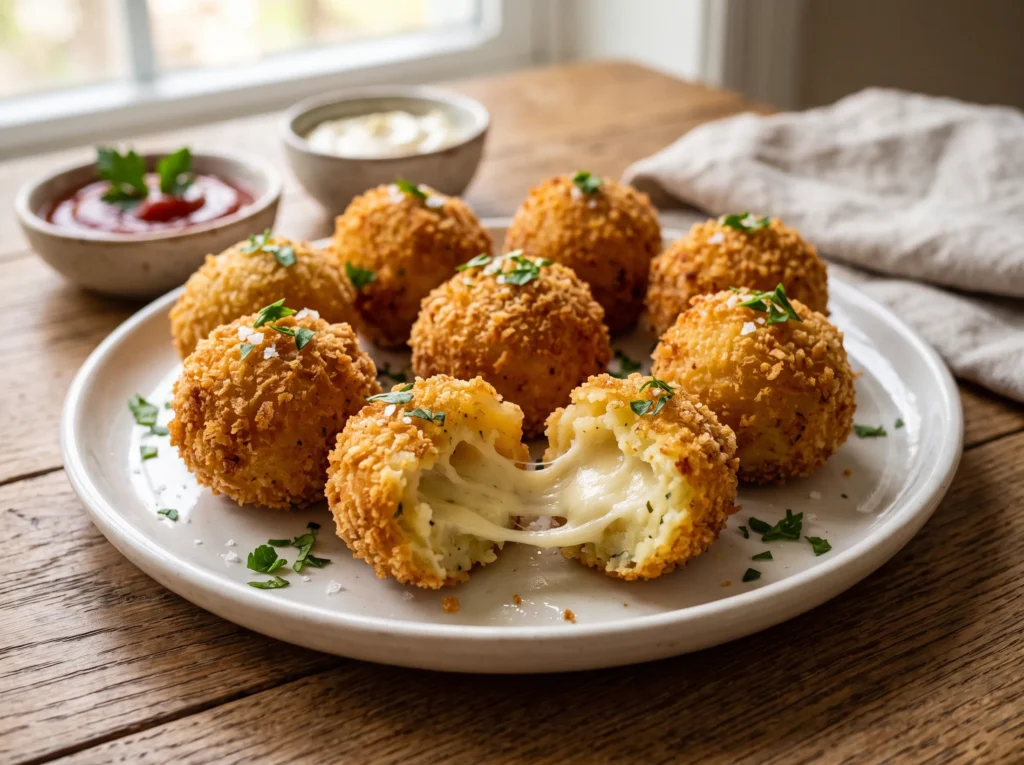
Crispy on the outside, soft and fluffy inside, and filled with warm, melty cheese, these Cheesy Potato Balls are the kind of snack that disappears quickly.
The outside turns beautifully golden and crunchy while the potato center stays creamy and tender. A little cheese in the middle adds a rich, savory bite that makes every ball extra satisfying.
This easy potato snack uses simple ingredients that are easy to find in most kitchens. Mashed potatoes are combined with a few seasonings and breadcrumbs, shaped around cheese, coated, and cooked until crisp.
The recipe is especially useful when leftover mashed potatoes need a delicious makeover. It also works well as a party appetizer, lunchbox snack, tea-time treat, or simple side dish.
For anyone who enjoys crispy snacks with a cheesy center, these potato balls are an easy recipe to keep on hand. They can be prepared ahead, frozen, and cooked when needed.
Serve them with ketchup, garlic sauce, chili sauce, or a creamy dip for an extra flavorful finish. For another comforting potato idea, try these crispy potato snacks for easy family meals.
Ingredients for Cheesy Potato Balls
The ingredient list is short, simple, and easy to adjust. The most important part is using potatoes that mash smoothly without becoming watery.
For the Potato Mixture
- 3 large potatoes, about 500 g, peeled and cut into chunks
- ½ cup shredded mozzarella cheese, about 50 g
- 2 tablespoons finely chopped fresh parsley
- ½ teaspoon garlic powder
- ½ teaspoon paprika
- ½ teaspoon salt, or to taste
- ¼ teaspoon black pepper
- 2 tablespoons cornstarch
- 2 tablespoons plain breadcrumbs
For the Cheese Filling
- 100 g mozzarella cheese, cut into small cubes
Mozzarella works especially well because it melts into a creamy, stretchy center. Cheddar can also be used for a stronger, richer flavor.
For the Coating
- ½ cup all-purpose flour
- 2 large eggs
- 1 cup plain breadcrumbs
For Cooking
- Vegetable oil, enough for deep-frying
For a lighter option, the balls can also be cooked in an air fryer or oven. Cooking instructions for both methods are included below.
Tools and Equipment
- Large pot
- Potato masher or fork
- Mixing bowl
- Small bowls for coating
- Slotted spoon
- Deep frying pan or heavy-bottomed pot
- Paper towels or a wire rack
- Baking tray if using an oven
- Air fryer if using the air-fryer method
Step-by-Step Instructions for Cheesy Potato Balls
1. Boil the Potatoes
Place the peeled and chopped potatoes in a large pot. Cover them with cold water and add a small pinch of salt.
Bring the water to a boil and cook the potatoes for about 15–20 minutes, or until they are completely tender when pierced with a fork.
Avoid overcooking the potatoes until they become waterlogged. Excess moisture can make the potato mixture difficult to shape.
2. Drain and Mash
Drain the potatoes thoroughly and allow them to sit in the pot for 2–3 minutes so excess steam can escape.
Mash the potatoes until smooth. Do not add milk, cream, or butter because extra moisture can make the balls soft and difficult to coat.
For the best texture, the mashed potatoes should be fluffy but firm enough to hold their shape.
3. Season the Potato Mixture
Transfer the mashed potatoes to a large mixing bowl.
Add the shredded mozzarella, chopped parsley, garlic powder, paprika, salt, black pepper, cornstarch, and 2 tablespoons of breadcrumbs.
Mix everything until evenly combined. The mixture should feel soft but firm enough to roll between the palms.
If the mixture seems too sticky, add another tablespoon of breadcrumbs. Avoid adding too many because they can make the potato center dense.
4. Prepare the Cheese Filling
Cut the mozzarella into small cubes.
Each cube should be small enough to fit comfortably inside a potato ball without reaching the edges. Keeping the cheese completely enclosed helps prevent it from leaking during cooking.
For a sharper flavor, small pieces of cheddar can be used instead of mozzarella.
5. Shape the Potato Balls
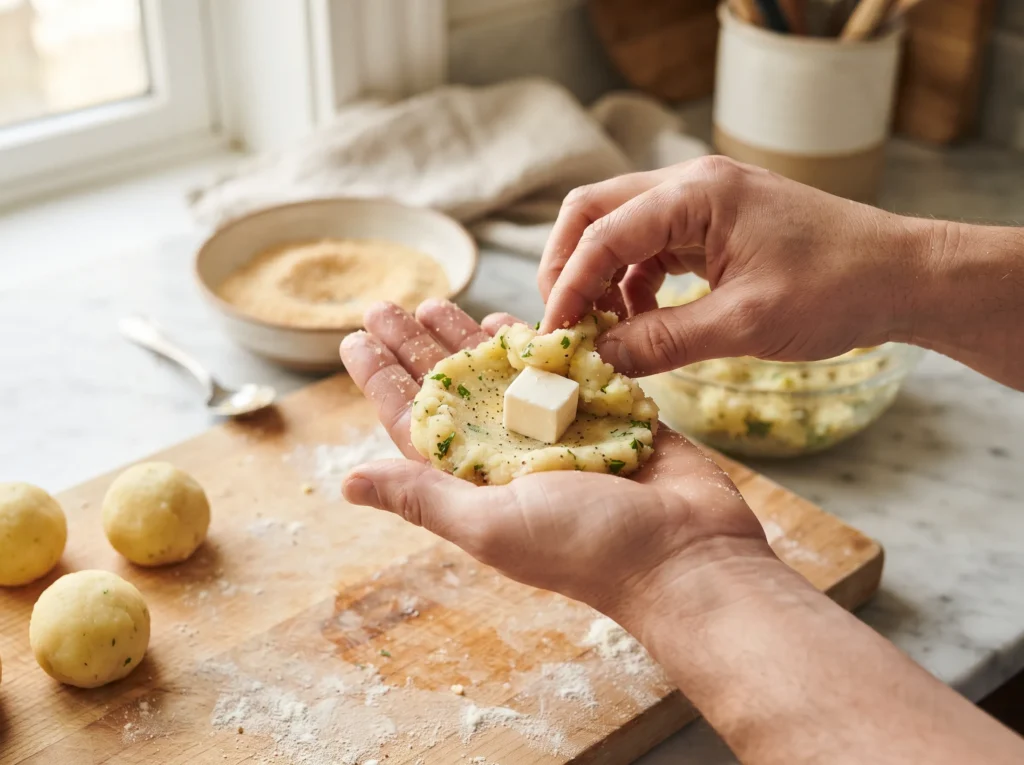
Take about 1½ tablespoons of the potato mixture and flatten it gently in the palm of the hand.
Place one cube of cheese in the center.
Carefully fold the potato mixture around the cheese and pinch the edges together. Roll gently between the palms until a smooth ball forms.
Make sure there are no cracks or exposed cheese. A sealed surface helps create a crisp coating while keeping the cheese tucked inside.
Repeat with the remaining potato mixture and cheese.
6. Set Up the Coating
Place the flour in one shallow bowl.
Beat the eggs in a second bowl until smooth. Place the remaining breadcrumbs in a third bowl.
This simple three-step coating gives the potato balls a crisp, golden exterior.
7. Coat Each Ball
Roll one potato ball lightly in the flour, making sure the surface is covered.
Dip it into the beaten egg and allow the excess egg to drip off.
Finally, roll it in the breadcrumbs until completely coated.
Repeat with all the potato balls.
For an extra-crispy coating, dip each ball into the egg and breadcrumbs a second time. A double coating creates a thicker crunch without changing the soft potato center.
8. Chill Before Cooking
Arrange the coated potato balls on a plate or tray without stacking them.
Place them in the refrigerator for about 20–30 minutes.
This short chilling time helps the coating set and makes the balls less likely to break apart while cooking.
For another make-ahead option, these can be prepared several hours before serving and kept chilled.
9. Deep-Fry Until Golden
Heat vegetable oil in a deep frying pan or heavy-bottomed pot over medium heat.
The oil should be hot enough to make a breadcrumb crumb sizzle immediately, but it should not be smoking.
Carefully lower a few potato balls into the hot oil. Avoid overcrowding the pan because too many balls at once can lower the oil temperature.
Fry for about 3–4 minutes, turning gently as needed, until the coating becomes golden brown and crisp.
Remove the balls with a slotted spoon and place them on a wire rack or paper towels to drain.
Continue with the remaining batches.
10. Oven-Baked Method
For an oven-baked version, preheat the oven to 220°C (425°F).
Place the coated potato balls on a lightly greased baking tray. Leave a little space between each one.
Lightly brush or spray the outside with vegetable oil.
Bake for approximately 20–25 minutes, turning halfway through, until the coating is golden and crisp.
The oven method produces a lighter crust than deep-frying, but the potato center remains soft and flavorful.
11. Air-Fryer Method
Preheat the air fryer to 200°C (400°F) for about 3 minutes.
Arrange the potato balls in the basket in a single layer. Do not overcrowd them.
Lightly spray or brush the balls with oil.
Air-fry for about 10–14 minutes, turning halfway through, until crisp and golden.
Cooking time can vary slightly between air fryers, so start checking toward the end of the cooking time.
12. Rest and Serve
Allow the cooked potato balls to rest for 2–3 minutes before serving.
The cheese inside will be extremely hot immediately after cooking. A short resting period also helps the filling settle slightly.
Serve warm with ketchup, garlic sauce, chili sauce, or a creamy dip.
For more easy appetizer inspiration, add these simple homemade party snack ideas to the menu.
Tips & Variations
Use Dry, Fluffy Potatoes
The potatoes should be drained very well after boiling.
Watery mashed potatoes can make the mixture sticky and difficult to shape. If the potatoes contain too much moisture, the balls may also crack during cooking.
Russet or other starchy potatoes are a good choice because they mash into a light, fluffy texture.
Do Not Add Milk
Traditional mashed potatoes often contain milk or cream, but this recipe does not need them.
Keeping the potatoes relatively dry gives the balls enough structure to hold the cheese and coating.
Keep the Cheese in the Center
Cheese that touches the outer surface can leak into the hot oil or onto the baking tray.
Use small cheese cubes and completely surround them with potato mixture before coating.
Take an extra moment to check for cracks before moving each ball into the flour.
Avoid Making the Balls Too Large
Large potato balls can brown on the outside before the center becomes properly hot.
Balls around 1½ to 2 inches in diameter are easier to cook evenly.
Smaller balls also make convenient finger food for parties and gatherings.
Do Not Overcrowd the Pan
When deep-frying, cook the balls in small batches.
Overcrowding can quickly lower the oil temperature. The coating may then absorb more oil instead of becoming crisp.
A steady medium heat gives the best balance of golden color and crunchy texture.
Chill Before Frying
Chilling is especially helpful when the potato mixture feels soft.
The cooler surface becomes easier to handle and the coating stays attached during cooking.
If the balls are being prepared in advance, they can remain covered in the refrigerator until cooking time.
Try Different Cheeses
Mozzarella gives the classic stretchy cheese center.
Cheddar provides a stronger and richer flavor. A mild cheese blend can also create a creamy, savory filling.
For a spicy version, finely chopped green chilies can be mixed into the potato mixture.
Add Fresh Herbs
Parsley adds a fresh flavor and a little color.
Finely chopped coriander can also be used for a slightly different taste. Keep the amount moderate so the herbs do not overpower the creamy potato and cheese.
Make Them Spicy
For more heat, add a pinch of chili flakes or a little cayenne pepper to the potato mixture.
Chili powder can also be used, depending on the preferred flavor.
A spicy dipping sauce on the side can add even more contrast.
Make Them Extra Crispy
A double breadcrumb coating gives the outside an especially crunchy texture.
After the first breadcrumb coating, dip the ball into the egg again and coat it with another layer of breadcrumbs.
This is particularly useful for deep-fried or air-fried potato balls.
Common Mistakes to Avoid
Using wet potatoes: This can create a loose mixture that is difficult to shape.
Overfilling with cheese: Too much cheese can cause the filling to burst through the coating.
Leaving cracks: Small cracks can become larger during cooking and allow melted cheese to escape.
Using cold oil: The balls can absorb oil and become greasy.
Using extremely hot oil: The outside may burn before the inside becomes warm.
Skipping the chilling step: Soft balls can be more likely to lose their shape during cooking.
Overmixing the potatoes: Excessive mixing can make potatoes gluey instead of fluffy.
For another way to enjoy potatoes with a crunchy finish, these easy crispy potato recipes for busy cooks are worth adding to a weekly meal plan.
Storage & Serving
How to Store Cheesy Potato Balls
Allow cooked potato balls to cool completely before storing them.
Place them in an airtight container and refrigerate for up to 3 days.
For the best texture, reheat them in an air fryer or oven rather than the microwave. Dry heat helps bring back some of the crispness.
Can They Be Frozen?
Yes. Cheesy Potato Balls freeze well when prepared correctly.
Arrange uncooked, coated balls on a baking tray in a single layer. Freeze until firm, then transfer them to a freezer-safe container or bag.
They can be stored in the freezer for up to 2 months for the best quality.
Cook them from frozen when possible, adding a few extra minutes to the cooking time. Avoid thawing them at room temperature because the coating can become soft.
How to Reheat Them
For an air fryer, heat at 180°C (350°F) for about 5–8 minutes.
For an oven, heat at 190°C (375°F) for approximately 8–12 minutes.
Cooking times depend on the size of the balls and how cold they are.
The microwave can be used when speed is more important than crispiness. Microwave reheating will make the coating softer.
What to Serve With Cheesy Potato Balls
These potato balls are delicious on their own, but a dip makes them even more enjoyable.
Try them with:
- Tomato ketchup
- Garlic mayonnaise
- Yogurt garlic sauce
- Sweet chili sauce
- Mint chutney
- Coriander chutney
- Spicy tomato dip
- Creamy cheese dip
For a party platter, serve several dipping sauces in small bowls and arrange the potato balls around them.
When to Serve Them
Cheesy Potato Balls work well for many occasions.
Serve them as a quick evening snack with tea, as an appetizer before dinner, or as finger food at family gatherings.
They are also useful for lunchboxes when packed with a suitable dip. Allow them to cool before packing so trapped steam does not soften the coating.
For a complete snack spread, pair them with fresh salad, sandwiches, or other easy finger foods.
Frequently Asked Questions
1. Why are my Cheesy Potato Balls falling apart?
The potato mixture may contain too much moisture, or the balls may not be sealed properly around the cheese.
Make sure the potatoes are drained well and completely cover the cheese before coating. Chilling the shaped balls before cooking can also improve their stability.
2. Which cheese is best for Cheesy Potato Balls?
Mozzarella is one of the best choices for a soft, stretchy center.
Cheddar works well when a stronger cheese flavor is preferred. Small cubes of either cheese are easier to seal inside the potato mixture.
3. Can Cheesy Potato Balls be made without eggs?
Yes. For an egg-free coating, use a thin mixture made from flour and water or milk, then coat with breadcrumbs.
The texture may be slightly different, but the outside can still become crisp and golden.
4. Can leftover mashed potatoes be used?
Yes. Leftover mashed potatoes are ideal as long as they are fairly dry and do not contain a large amount of milk, cream, or other liquid.
If the mash is soft, add a little extra breadcrumbs or cornstarch until it becomes firm enough to shape.
5. Why did the cheese leak out while cooking?
The cheese may have been too close to the outside or the potato covering may have had a small crack.
Use smaller cheese cubes and make sure each ball has a completely sealed potato layer before coating.
6. Can these potato balls be made ahead?
Yes. The shaped and coated balls can be refrigerated for several hours before cooking.
For longer storage, freeze the uncooked balls in a single layer before transferring them to a freezer-safe container.
7. Are Cheesy Potato Balls better fried or baked?
Deep-frying produces the crunchiest and most evenly golden exterior.
Baking and air frying are lighter alternatives and still create a pleasant crisp coating, especially when the balls are lightly brushed with oil.
8. How do you make potato balls extra crispy?
Use dry mashed potatoes, coat them thoroughly with breadcrumbs, and cook them at the correct temperature.
A double breadcrumb coating can provide an even crunchier exterior.
9. Can other vegetables be added?
Yes. Finely chopped cooked vegetables such as carrots, peas, or sweet corn can be added in small amounts.
Make sure the vegetables are not watery. Too much moisture can weaken the potato mixture.
10. Can Cheesy Potato Balls be made without deep-frying?
Absolutely. The oven and air fryer methods work well.
Air frying usually gives a crispier surface than baking, while the oven is convenient when preparing a larger batch.
Conclusion
Crispy, golden, fluffy, and filled with warm melted cheese, Cheesy Potato Balls are an easy snack that turns simple ingredients into something special.
The recipe is flexible enough for different cooking methods and cheese choices, while the basic preparation remains simple for beginner home cooks.
Whether served as a party appetizer, lunchbox treat, evening snack, or comforting side dish, these potato balls offer a delicious combination of crunchy coating, creamy potato, and rich cheesy filling.
Prepare a batch for the next family gathering or keep some frozen for a quick snack whenever a crispy, cheesy bite is needed. Enjoy them warm with a favorite dip and share the recipe with anyone who loves easy homemade snacks.