
The Ultimate Melty Cheese Toast
Crispy golden bread, rich melted cheese, and a buttery finish make this toast impossible to resist. Each bite has a satisfying crunch around the edges followed by a soft, stretchy, cheesy center.
The Ultimate Melty Cheese Toast is a simple recipe made for busy mornings, quick lunches, afternoon snacks, or easy comfort food. It needs only a handful of everyday ingredients and takes just minutes to prepare.
The secret is simple: use sturdy bread, a flavorful blend of cheeses, and gentle heat. This gives the bread enough time to turn crisp and golden while the cheese melts into a creamy, gooey layer.
There is no complicated sauce, special equipment, or advanced cooking technique required. It is an easy cheesy toast recipe that beginners can make confidently.
Ingredients
For the Cheese Toast
- 4 slices thick-cut white or sourdough bread
- 1 tablespoon unsalted butter, softened
- 1 cup shredded mozzarella cheese
- 1/2 cup shredded cheddar cheese
- 2 tablespoons cream cheese, softened
- 1/2 teaspoon garlic powder
- 1/4 teaspoon dried oregano
- 1/4 teaspoon black pepper
- 1 tablespoon finely chopped fresh parsley, optional
For the Pan
- 1 teaspoon unsalted butter or neutral cooking oil
Tools Needed
- Nonstick skillet or heavy-bottomed frying pan
- Small mixing bowl
- Butter knife
- Spatula
- Cheese grater
- Measuring spoons
Step-by-Step Instructions
1. Prepare the Cheese Mixture
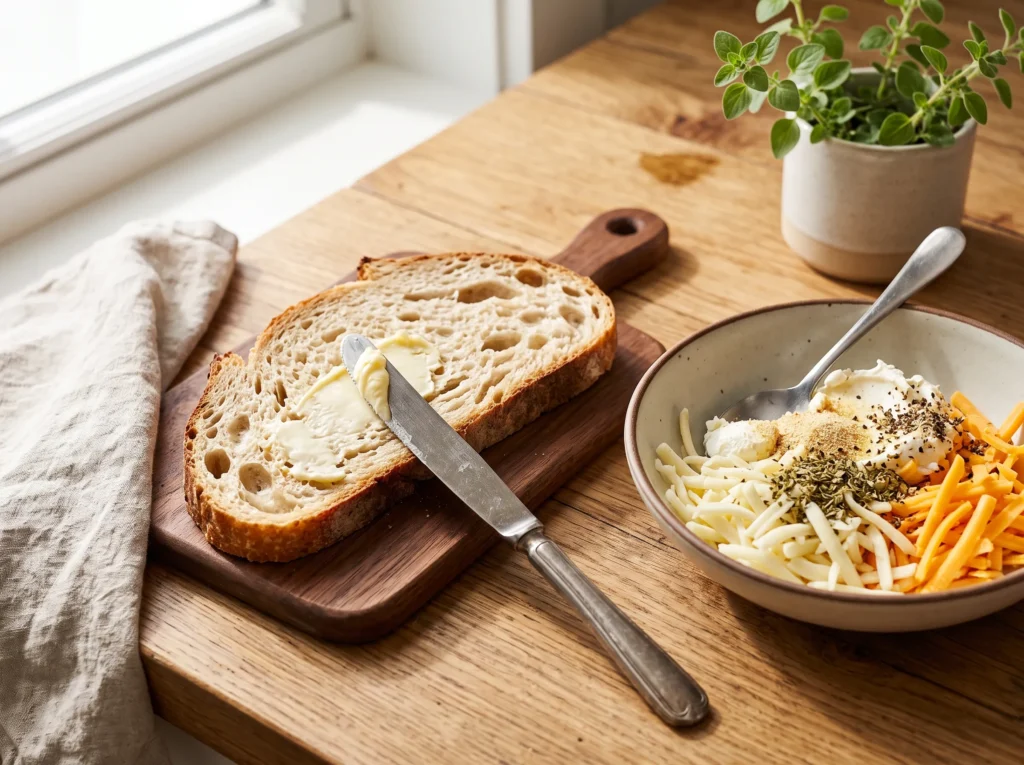
Add the shredded mozzarella, shredded cheddar, softened cream cheese, garlic powder, dried oregano, and black pepper to a small bowl.
Mix until the cheeses and seasonings are evenly combined.
The cream cheese helps create a smooth, creamy filling while mozzarella adds stretch and cheddar brings a stronger savory flavor.
2. Butter the Bread
Spread the softened butter evenly over one side of each bread slice.
Cover the surface from edge to edge, especially around the corners. This helps the bread become evenly crisp and golden.
3. Build the Toast
Place two slices of bread butter-side down.
Divide the cheese mixture evenly between them, spreading it close to the edges without letting it spill over.
Top each with another slice of bread, keeping the buttered sides facing upward.
4. Heat the Skillet
Place a nonstick skillet over medium-low heat.
Add 1 teaspoon of butter or neutral cooking oil and allow it to warm gently.
Avoid high heat. The bread can brown too quickly before the cheese has time to melt.
5. Cook the First Side
Carefully place the assembled cheese sandwiches in the skillet.
Cook for 3 to 4 minutes, or until the bottom is crisp and golden brown.
Press gently with a spatula once or twice, but do not flatten the toast too much.
6. Flip Carefully
Use a wide spatula to turn each toast over.
The cheese will be soft and may shift slightly, so flip gently and confidently.
7. Melt the Cheese
Cook the second side for another 3 to 4 minutes over medium-low heat.
The toast should be golden and crisp while the cheese inside becomes completely melted, creamy, and stretchy.
If the bread is browning before the cheese melts, reduce the heat to low and cover the skillet for 30 to 60 seconds.
8. Rest Briefly
Transfer the finished cheese toast to a plate.
Let it rest for about 1 minute before cutting.
This short rest allows the melted cheese to settle slightly while the bread stays crisp.
9. Slice and Serve
Cut each toast diagonally into two pieces.
Sprinkle with fresh parsley if desired and serve immediately while the cheese is warm and gooey.
For another simple cheesy option, try adding [crispy cheese breakfast recipes] to a weekend breakfast menu.
Tips & Variations
Use Thick Bread
Thicker bread gives the toast a sturdy structure and provides a better contrast between crisp edges and soft, cheesy filling.
Sourdough, white sandwich bread, brioche-style bread, or country bread can all work well.
For a sweeter bread such as brioche, reduce the seasonings slightly so the cheese remains the main flavor.
Shred Cheese Fresh
Freshly shredded cheese usually melts more smoothly than many pre-shredded varieties.
Pre-shredded cheese can still be used when convenience matters, but freshly grated cheese gives the toast a softer, creamier texture.
Use Medium-Low Heat
Low and steady heat is the key to getting both crispy bread and fully melted cheese.
High heat may burn the outside before the cheese has melted properly.
Do Not Overfill
A generous layer of cheese is delicious, but too much can cause the filling to squeeze out during cooking.
Keep the cheese mixture slightly inside the edges of the bread for easier flipping.
Cover the Pan If Needed
If the bread is golden but the cheese remains firm, cover the skillet briefly.
The trapped heat helps melt the cheese without adding too much color to the bread.
Add a Little Heat
For a spicy version, add a small pinch of crushed red pepper flakes to the cheese mixture.
A little paprika can also add gentle warmth and extra color.
Try Different Cheese Combinations
The cheese blend can easily be changed depending on what is available.
Try mozzarella with Monterey Jack for an extra-stretchy filling.
Cheddar and gouda create a deeper, richer flavor.
Mozzarella and mild cheddar offer a familiar flavor that works especially well for children.
For more inspiration, serve this toast alongside [easy baked cheese appetizers] for a simple snack spread.
Add Fresh Herbs
Fresh parsley adds brightness without overpowering the cheese.
Chopped chives, coriander, or a small amount of fresh basil can also work well.
Add delicate fresh herbs after cooking for the best flavor.
Add Vegetables
Finely chopped cooked mushrooms, spinach, bell peppers, or sweet corn can turn the toast into a more filling snack.
Make sure vegetables are cooked and fairly dry before adding them so the bread does not become soggy.
Add Chicken
For a heartier version, add a small amount of finely shredded cooked chicken to the cheese mixture.
Use plain seasoned chicken and avoid adding too much, since a thick filling can make the toast difficult to flip.
Make It Garlic-Forward
Increase the garlic powder slightly or add a small amount of fresh minced garlic to the softened butter.
For a gentler garlic flavor, mix garlic powder into the butter instead.
Avoid These Common Mistakes
Using high heat: This is the most common mistake. A hot pan can burn the bread while leaving the center cold.
Using cold cream cheese: Softened cream cheese blends more easily with the shredded cheeses.
Skipping the butter: Butter helps create the crisp, golden exterior that makes this toast so satisfying.
Adding wet ingredients: Watery vegetables or sauces can make the bread soggy.
Cutting immediately: A one-minute rest helps keep the melted cheese inside instead of letting it rush out onto the plate.
Make It Extra Crispy
For a crunchier exterior, spread the butter slightly more generously over the bread.
Keep the heat at medium-low and allow the toast to cook slowly until deeply golden.
A heavy skillet can also help maintain steady heat.
Make It Creamier
For a softer, richer cheese filling, increase the cream cheese to 3 tablespoons.
This creates a smoother interior while still allowing the mozzarella to provide plenty of stretch.
Storage & Serving
This toast tastes best straight from the skillet.
The bread is at its crispiest and the cheese is at its creamiest immediately after cooking.
If leftovers remain, allow them to cool completely before storing. Place them in an airtight container and refrigerate for up to 2 days.
For best results, reheat refrigerated toast in a skillet over low heat for a few minutes on each side.

An air fryer can also restore some crispness. Reheat at 350°F (175°C) for about 3 to 5 minutes, checking early.
Microwaving is quick, but it can make the bread soft rather than crispy.
Freezing is not recommended for the assembled toast because the bread can lose its crisp texture after thawing.
Simple Serving Ideas
Serve the toast with fresh fruit for a quick breakfast.
For lunch, pair it with tomato soup, vegetable soup, or a crisp green salad.
A small bowl of tomato chutney or a mild dipping sauce can also add extra flavor.
For a family snack, cut the toast into smaller triangles and serve it on a platter.
A selection of [quick homemade cheese snacks] can turn the toast into part of an easy afternoon snack board.
Frequently Asked Questions
1. What is the best cheese for melty toast?
Mozzarella is excellent for stretch, while cheddar adds stronger flavor. Combining the two gives a good balance of meltability and savory taste.
2. Why is the cheese not melting?
The pan may be too hot or the cheese layer may be too thick. Lower the heat and cover the skillet briefly to help the center warm through.
3. Can regular sandwich bread be used?
Yes. Regular sandwich bread works well, although thicker slices are less likely to become overly soft while the cheese melts.
4. Can this recipe be made without cream cheese?
Yes. Simply replace the cream cheese with an extra 2 tablespoons of shredded mozzarella or cheddar. The filling will be slightly less creamy but still delicious.
5. Can butter be replaced with oil?
Yes. A small amount of neutral cooking oil can be used for the skillet, but butter gives the bread a richer flavor and more traditional golden finish.
6. Can cheese toast be made in an oven?
Yes. Assemble the toast and place it on a baking sheet. Bake at around 400°F (200°C) until the bread is golden and the cheese has melted, flipping if needed.
7. How can the bread stay crispy?
Cook over medium-low heat without covering the skillet for most of the cooking time. Only cover briefly if the cheese needs extra help melting.
8. Can vegetables be added?
Yes. Cooked mushrooms, spinach, peppers, and sweet corn are good options. Keep the additions finely chopped and relatively dry.
9. Is sourdough good for cheese toast?
Yes. Sourdough provides a crisp crust and slightly tangy flavor that pairs beautifully with rich melted cheese.
10. Can the toast be prepared ahead of time?
The cheese mixture can be prepared a few hours ahead and refrigerated. Assemble and cook the toast just before serving for the best texture.
Conclusion
Crispy bread and warm, gooey cheese are a simple combination that never gets old. With buttery golden edges, a creamy center, and plenty of stretchy melted cheese, this toast feels far more special than the short ingredient list suggests.
The recipe is quick enough for a busy morning and comforting enough for a relaxed evening snack. A few simple cheeses and basic pantry ingredients are all that stand between the kitchen and a hot, satisfying meal.
Keep the heat gentle, let the cheese melt slowly, and serve the toast while it is warm and crisp.
For an easy recipe that delivers big flavor with very little effort, The Ultimate Melty Cheese Toast is a delicious choice worth making again and again.