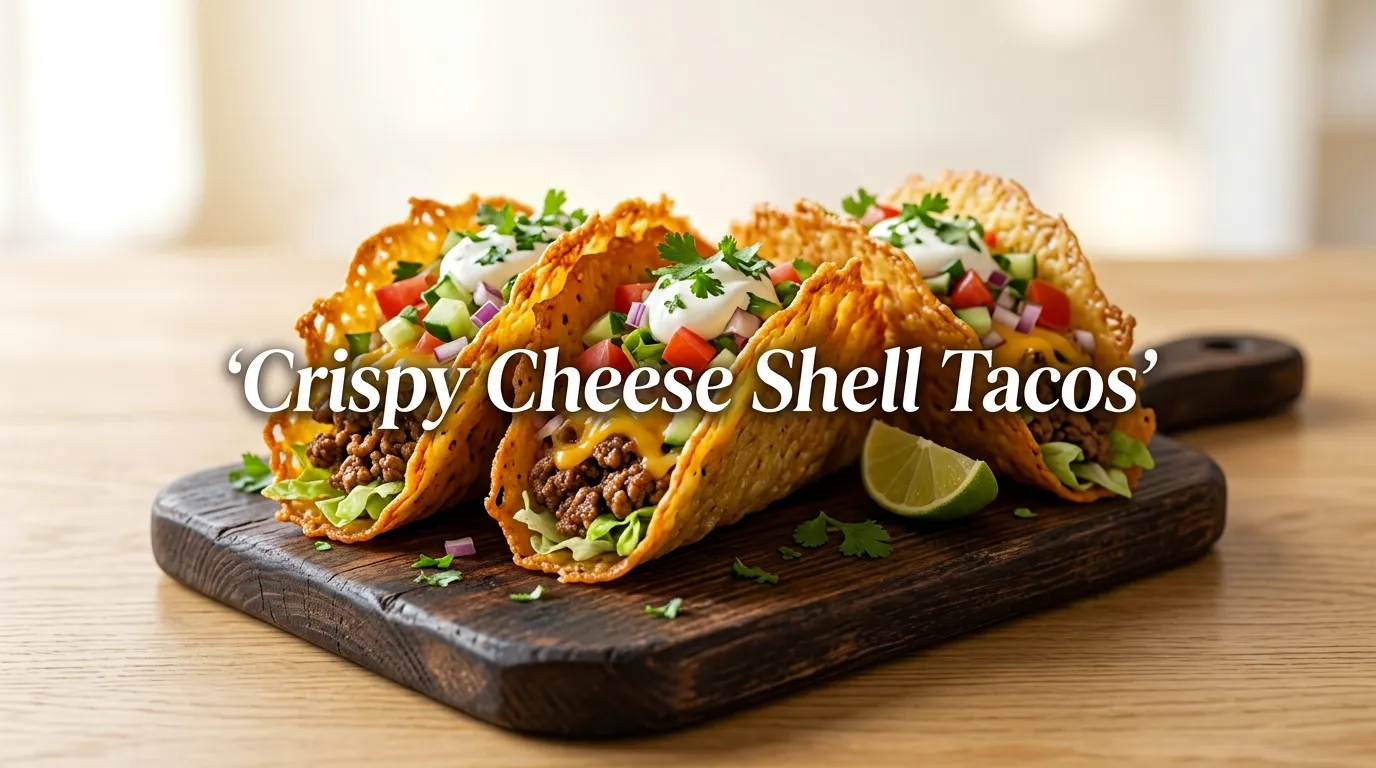
Crispy Cheese Shell Tacos
Crispy, golden cheese shells filled with juicy, perfectly seasoned beef and fresh toppings create an irresistible meal that is both fun and satisfying. Every bite combines crunchy cheese, tender meat, creamy sauce, and crisp vegetables for an unforgettable texture.
These Crispy Cheese Shell Tacos are a delicious twist on traditional tacos. Instead of regular taco shells, melted cheese is baked until crisp and shaped into taco shells while still warm. The result is a naturally gluten-free shell packed with rich, cheesy flavour.
This recipe is simple enough for beginners and quick enough for busy weeknights. With easy ingredients and straightforward steps, anyone can create restaurant-quality tacos at home. For more Mexican-inspired favourites, take a look at the Easy Chicken Quesadilla Recipe and the Homemade Beef Burrito Bowl for more family dinner ideas.
Ingredients for Crispy Cheese Shell Tacos
For the Cheese Taco Shells
- 3 cups shredded cheddar cheese
- 1 cup shredded mozzarella cheese
For the Taco Filling
- 500 g halal ground beef
- 1 tablespoon olive oil
- 1 small onion, finely diced
- 2 garlic cloves, minced
- 1 teaspoon paprika
- 1 teaspoon ground cumin
- 1 teaspoon chilli powder
- ½ teaspoon oregano
- ½ teaspoon black pepper
- 1 teaspoon salt
- 2 tablespoons tomato paste
- ¼ cup water
Toppings
- 1 cup shredded lettuce
- 1 cup diced tomatoes
- ½ cup diced cucumber
- ¼ cup finely chopped red onion
- ½ cup shredded cheddar cheese
- ¼ cup sour cream or plain Greek yogurt
- Fresh coriander leaves
- Lime wedges
- Sliced jalapeños (optional)
Equipment Needed
- Large frying pan
- Baking tray
- Baking paper
- Cooling rack
- Oven
- Mixing spoon
- Spatula
- Measuring spoons
- Knife
- Cutting board
Step-by-Step Instructions for Crispy Cheese Shell Tacos
Step 1: Prepare the Filling
Heat olive oil in a large frying pan over medium heat.
Add the diced onion and cook for about 3 minutes until soft.
Stir in the garlic and cook for another minute.
Step 2: Cook the Beef
Add the ground beef.
Break it apart with a spoon while cooking until browned and fully cooked.
Drain any excess fat if necessary.
Step 3: Season the Meat
Mix in paprika, cumin, chilli powder, oregano, salt, and black pepper.
Add tomato paste and water.
Cook for 5 minutes until the mixture becomes thick and flavourful.
Remove from the heat.
Step 4: Make the Cheese Shells
Preheat the oven to 200°C.
Line a baking tray with baking paper.
Place small piles of mixed cheddar and mozzarella cheese onto the tray.
Flatten each pile into circles about 15 cm wide.
Leave enough space between each circle.
Step 5: Bake
Bake for 6–8 minutes until the edges turn deep golden and bubbly.
Watch carefully because cheese can brown quickly.
Step 6: Shape the Shells
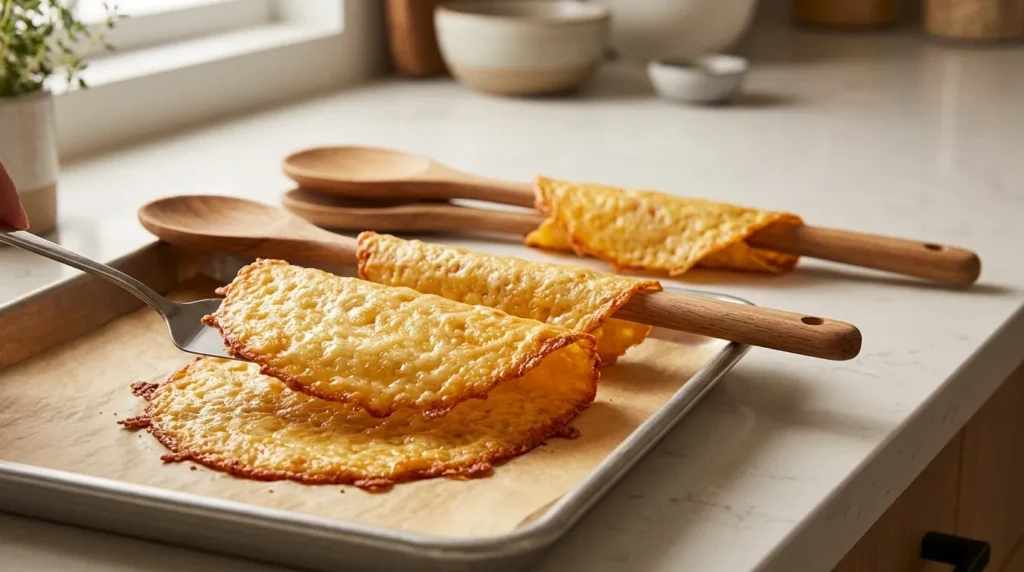
Allow the cheese circles to cool for about 30 seconds.
Carefully lift each one with a spatula.
Drape over two wooden spoon handles or an inverted muffin tin to create taco shapes.
Cool completely until firm and crispy.
Step 7: Assemble
Fill each cheese shell with the seasoned beef.
Top with lettuce, tomatoes, cucumber, onions, shredded cheese, sour cream, coriander, and jalapeños if desired.
Serve immediately with fresh lime wedges.
Tips & Variations for Crispy Cheese Shell Tacos
Choosing freshly shredded cheese instead of pre-packaged cheese helps the shells melt evenly and become crisp.
Allow the cheese to cool slightly before shaping. If shaped too early, it may tear. If cooled too much, it may harden before folding.
Ground chicken or turkey makes a lighter filling while keeping the same delicious flavour.
For a vegetarian version, replace the beef with seasoned black beans, chickpeas, or sautéed mushrooms.
A pinch of smoked paprika gives the filling a deeper smoky flavour.
Add sliced avocado for extra creaminess.
Swap sour cream with plain Greek yogurt for a lighter topping.
Avoid overfilling the shells because they can crack under too much weight.
Serve immediately after assembling for the crispiest texture.
Anyone looking for another crunchy dinner idea may also enjoy the Crispy Ranch Chicken Wraps or the Honey Garlic Butter Chicken for an easy family meal.
Storage & Serving
Cheese taco shells stay crisp for the best flavour when enjoyed fresh.
If leftover shells remain, store them in an airtight container at room temperature for up to 2 days.
The cooked beef filling can be refrigerated in a sealed container for up to 4 days.
Freeze the beef filling for up to 3 months.
Reheat the filling in a frying pan or microwave before serving.
Prepare fresh cheese shells when ready to eat for the best crunch.
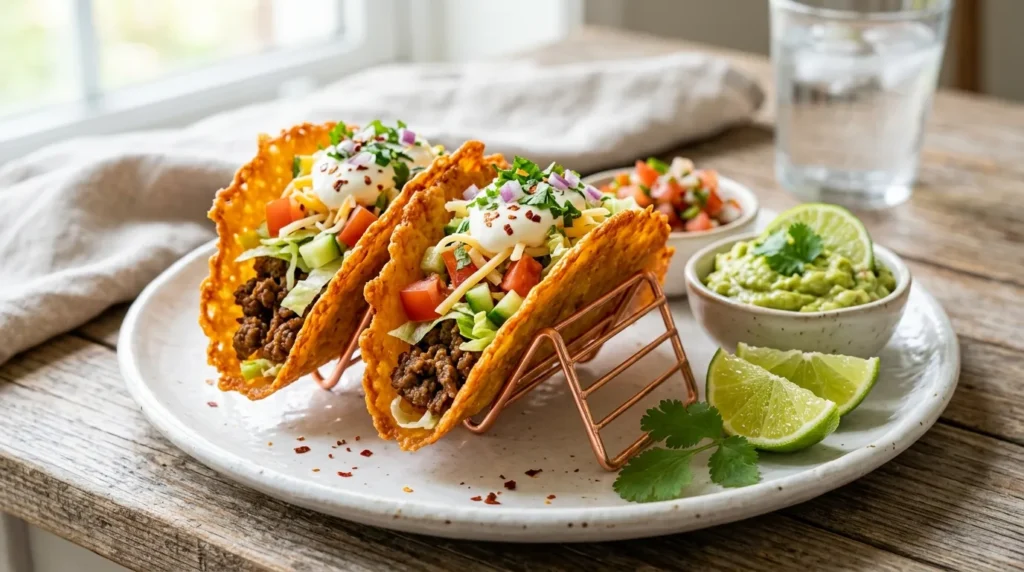
Serve alongside:
- Mexican rice
- Corn salad
- Guacamole
- Fresh salsa
- Roasted vegetables
- Homemade tortilla chips
- Fresh lime wedges
Frequently Asked Questions
Can cheese really replace taco shells?
Yes. When baked until golden and cooled in a taco shape, cheese becomes wonderfully crispy while holding the filling securely.
Which cheese works best?
Cheddar creates the crispiest shell, while mozzarella adds flexibility. A combination of both provides excellent texture and flavour.
Can the shells be made ahead?
Yes. Prepare them one day ahead and store them in an airtight container at room temperature.
How can broken shells be prevented?
Let the cheese cool for about 30 seconds before shaping. Folding too soon or too late may cause cracking.
Can chicken be used instead of beef?
Absolutely. Ground chicken is an excellent halal-friendly substitute and works perfectly with the same seasoning.
Are these tacos gluten-free?
Yes, provided every seasoning and topping used is certified gluten-free.
Can the recipe be made spicy?
Certainly. Add extra chilli powder, chopped jalapeños, or a spicy halal hot sauce.
What toppings taste best?
Lettuce, tomatoes, cucumber, onions, coriander, avocado, shredded cheese, and sour cream all pair beautifully with crispy cheese shells.
Why did the cheese shells turn soft?
Soft shells usually result from underbaking. Bake until the edges become golden brown for maximum crispiness.
Can the filling be prepared in advance?
Yes. The beef filling can be refrigerated for several days and reheated just before serving.
Conclusion
These Crispy Cheese Shell Tacos transform a simple taco dinner into something extra special with their crunchy, cheesy shell and rich, savoury filling. The recipe uses everyday ingredients, comes together in about 30 minutes, and delivers incredible flavour in every bite.
Whether served for a quick family dinner, game night, or weekend gathering, these tacos are guaranteed to impress. Try this easy recipe, customise it with favourite toppings, and enjoy a delicious homemade meal that everyone will want again.